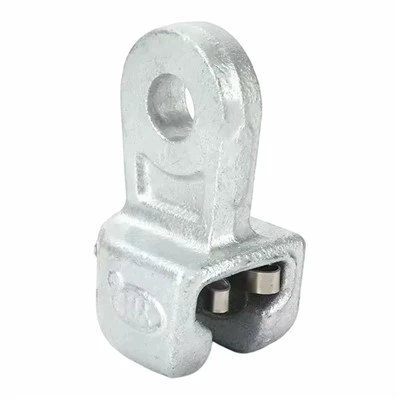
Hey there, if you’re reading this, chances are you’ve stared at a pile of power fittings—connectors, lugs, splices, the whole shebang—and thought, “Wait, am I putting this together right?” As a power fittings supplier who’s been in this game for over 12 years, I’ve seen way too many botched installs. Last year alone, I got three panicked calls from customers who messed up a simple crimp on a copper lug and ended up with a service outage that cost them thousands. Let me save you that headache. Today we’re breaking down how to install power fittings correctly—no fancy jargon, no overcomplicated steps, just real, usable stuff that works for everyone, from a DIY electrician on a small job to a maintenance lead at a big warehouse. First, let’s get one thing straight: power fittings aren’t “one-size-fits-all.” I know it sounds basic, but you’d be shocked how many people grab the first connector they see and call it a day. Let’s start with pre-install prep, because skipping this step is where 90% of mistakes start. Power Fittings
First up: know your specs. What’s the wire gauge? Is it copper or aluminum? What’s the voltage and amperage of the circuit? If you’re using a lug, does it match both the wire size and the breaker or bus bar you’re connecting to? I can’t tell you how many times a customer comes to me with a 2/0 AWG aluminum wire and a copper lug—big no-no. Copper and aluminum react differently when exposed to air, and if they touch without a anti-oxidant compound, you get corrosion, which leads to loose connections and overheating. Also, check the temperature rating of the fitting. If you’re installing something in a hot attic or near industrial equipment, you can’t use a regular 90°C fitting—you need a 105°C or higher. Most power fittings will list their specs right on the packaging, so don’t just toss that box; tape it to the job site if you have to. Next, inspect every single part before you even touch a tool. I once had a customer use a crimping lug that had a tiny crack in the barrel, and when they crimped it, the crack got worse, leading to a partial disconnect mid-job. Check for dents, scratches, or discoloration on the fitting—even a tiny flaw can mess with the conductivity. Also, check the wire itself: if the insulation is frayed, or there are broken strands, trim that section off. A broken wire strand is like a weak spot in a chain—it’ll break when you need it most.
Now, let’s get to the actual installation, and let’s start with the two most common fittings people use: lugs and splices. Let’s do lugs first, because those are probably the most frequently misinstalled. Step 1: Strip the insulation correctly. This is another area where people cut corners. You want to strip just enough insulation so that the wire fits all the way into the lug barrel, but not so much that the bare wire sticks out past the barrel. If bare wire is exposed, it can touch other parts of the circuit and cause a short. How much is “just enough”? Follow the fitting’s instructions (yes, read the manual—shocking, I know) but as a rule of thumb, leave about 1/8 inch of bare wire inside the barrel. Step 2: Prepare the wire and lug for crimping. If you’re working with aluminum wire, this is non-negotiable: apply anti-oxidant paste to both the bare wire and the inside of the lug. Aluminum oxidizes really quickly, and that oxide layer is a poor conductor, so the paste creates a barrier to keep oxidation out. For copper, you can skip the paste, but if you’re in a humid or outdoor environment, it’s a good idea to use a tiny bit to prevent corrosion too. Step 3: Crimping. This is where most people go wrong. Don’t use a random crimping plier you have in your garage—you need a plier or a hydraulic tool that’s designed for the exact size of lug and wire you’re using. Using the wrong tool means an uneven crimp, which will loosen over time. When you crimp, make sure you’re crimping the barrel in the right place: most lugs have specific indentation points marked on the barrel, so line the crimping die up with that. For stranded wire, you should crimp at least two points on the barrel—one near the insulation and one near the tip of the wire. If you only crimp one spot, the wire can shift inside the barrel. After crimping, tug the wire gently to make sure it’s not moving. If it comes loose, you didn’t crimp it right—don’t just call it good.
Next up: splices. These are used when you need to connect two or more wires together, and again, misinstalling them is a recipe for disaster. First, same prep as lugs: strip the insulation, trim any broken strands, check the wire gauge. When it comes to the splice, make sure the splice connector matches the wire size and type (copper or aluminum). For butt splices, insert both wires all the way into the splice—no bare wire sticking out, no insulation inside the splice. For twist-on splices (wire nuts), make sure you twist them until they’re tight, and then tug gently again. A lot of people under-twist wire nuts, and they fall off, leading to exposed wires. Another tip: for aluminum wire splices, use aluminum-specific wire nuts or fill the splice with anti-oxidant compound before twisting, same as with lugs. If you’re using a heat-shrink splice, make sure you heat it evenly from the middle out, so the heat-shrink shrinks all the way and creates a tight seal. Don’t hold the heat gun in one spot too long—you’ll melt the insulation or the splice itself.
Now, what about larger fittings, like bus bar connectors or panelboard fittings? These are for bigger jobs, like connecting circuits to a main panel, and they come with a whole other set of rules. First, torque is your friend here. Most panelboard lugs and bus bar connectors have a specified torque value—this is the amount of force you need to apply with a torque wrench to tighten the bolt. If you under-tighten, the connection will get loose, create heat, and eventually fail. If you over-tighten, you can strip the threads on the bolt or the fitting, or crack the bus bar. That’s not a cheap fix, trust me. I once had a customer over-tighten a bus bar connector on a 480V panel, and they cracked the bar—had to replace the whole panel, which cost them $10k just for that mistake. The torque value will be printed on the fitting, usually in inch-pounds or foot-pounds, so use a torque wrench and follow it exactly. No guessing. Also, when installing panelboard fittings, make sure the connection is clean. Wipe the bus bar and the fitting bolt with a clean cloth to get rid of any dust, oil, or debris—even a tiny speck of dirt can cause a bad connection.
Wait, I should mention outdoor installations too, because those have extra rules. If you’re putting power fittings outside, they need to be rated for wet locations. Dry-rated fittings will rust or corrode when exposed to rain, snow, or humidity, so always check the NEMA rating—NEMA 3R or higher is good for most outdoor applications. Also, use stainless steel bolts and hardware for outdoor installs, not regular steel, which will rust. Another thing: if you’re installing fittings underground, make sure they’re rated for direct burial. Some splices and lugs aren’t designed to be buried, and the dirt and moisture will eat through them quickly. I’ve seen customers use regular crimp lugs for underground runs, and within a year, the connection was completely corroded.
Now, common mistakes I see every single day, so you can avoid them. First: mixing copper and aluminum fittings without a transition. If you need to connect copper wire to aluminum wire, don’t just use a copper lug on the copper and an aluminum lug on the aluminum and bolt them together. That’s a dissimilar metal connection, and it causes corrosion. Use a transition fitting, which has a copper side and an aluminum side, so they’re compatible. Second: skipping insulation after crimping. After you crimp a lug, you need to cover the bare part of the barrel and the wire with insulation—either a heat-shrink tube that fits over it, or electrical tape. Bare wire sticking out is a shock hazard and can cause shorts. Third: not testing after installation. You’d be amazed how many people finish a job and just flip the breaker on, no test. Always use a multimeter to check for continuity and make sure the voltage is where it should be. If there’s no continuity, that means your crimp or splice is bad, and you need to redo it. Don’t assume it worked just because everything is connected.
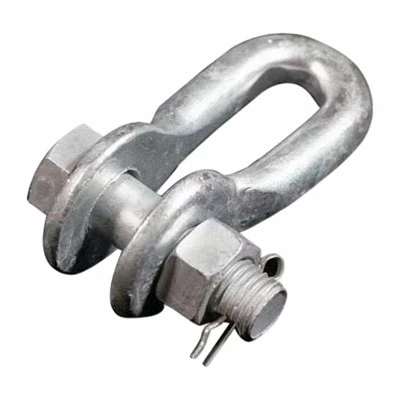
As a power fittings supplier, I know it’s tempting to cut corners to save time or money. Maybe you use a cheaper off-brand fitting, or skip the anti-oxidant paste, or use the wrong crimping tool. But here’s the thing: the cost of a bad installation is way higher than the cost of doing it right. A $5 lug that’s installed wrong can cause a fire, a service outage, or even an injury. I’ve been in this business long enough to know that 90% of the issues we get called about are from incorrect installation, not defective parts. So take the time to prep right, use the right tools and fittings, follow the steps, and test when you’re done.
Protective Fittings If you’re working on a big job and need help picking the right power fittings, or if you have questions about a specific installation, don’t hesitate to reach out. We’ve helped electricians, maintenance teams, and DIYers for years, and we’re happy to answer any questions you have. Whether you need small lugs for a residential project or heavy-duty bus bar fittings for an industrial facility, we’ve got you covered. Just get in touch to chat about your needs, and we’ll make sure you get the right parts and the right advice to get the job done safely and correctly.
References
- National Electrical Code (NEC), Article 110.14 – Connection Methods, 2023 Edition
- Copper Development Association, “Aluminum-Wire to Copper-Wire Connections,” 2022
- International Electrotechnical Commission (IEC) 61238-1, Compression and Mechanical Power Fittings for Rated Voltages Up to 36 kV, 2020
Hebei Tongchuang Power Fittings Co., Ltd.
With abundant experience, we are one of the most professional power fittings manufacturers and suppliers in China. Please feel free to buy advanced power fittings for sale here from our factory. Good service and quality products are available.
Address: Houxiaohan Industrial Zone, Xingbieying Town, Hejian City, Hebei Province, P.R. China
E-mail: tongchuangepf@gmail.com
WebSite: https://www.tongchuangpower.com/
